Posts

Showing posts from March, 2017

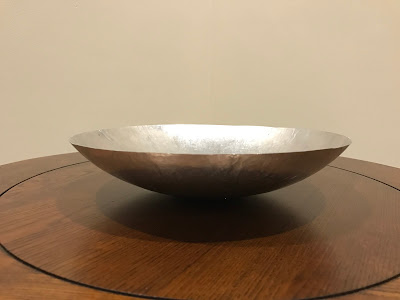
Week 5: After the torus, the tray begin

Image
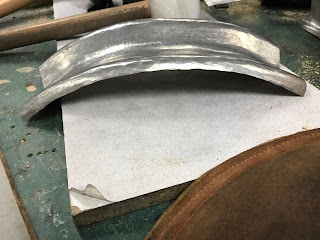
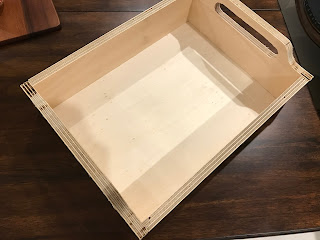
The torus has been finished in the week 5, the new task has been introduced into our journal of this class - to make a pair of tray. Tray Demonstration  The task is that to create a pair of trays with a classmate, which two trays have to be same size. (maximum size would be 250mm in any axis). Hence, Ting Ting who is my team member and I decided to create a 250mm x 150mm x 10mm rectangle metal tray. My team member created a timber module by the exactly size that we decided for the beginning. After draw the tray outline on the metal sheet, using the metal scissor to make the four corner round. The module and the metal sheet has been hold on the holder, and the four side edges was beat to bend with the module by hammers beating. Until now, everything was going smoothly, but when beating the four corners to bend inside, the metal sheet started to being difficult to control, which it started to fold together, and the edge has many wave shapes.  After a long time b

Week 4: Finish the bowl and start the torus

Image
Made the bowl better curve with English Wheels. Then I started to create the second metal items - the torus Firstly, cutting the large metal sheet to rectangle shape by the guillotine, which it only can cut metal sheets and flexible plastics. And then, using the metal roller to bend the flat metal sheet become a curve sheet, the process has been done many times to create a perfect curve. After that, I tried to use the metal bender to bend the entire U-sheet become a curve shape as well... The result seems not good😅 Therefore, I started to create the second torus, which using different process to create the same shape to the metal sheet The timber module has been created with a smooth notch. The tools for the second torus are the hammers and a iron shapes with holders.  The metal sheet was cut to become a rectangle sheet and roll to the timber module; then started to beat the middle into the notch, and keep this process until shap

Week 3: Workshop tools introduction & the bowl starts

Image
Join in the introduction of workshop for all necessary tools - drill, saws, sanders, etc. Made a drawer by all tools in the introduction: Draw the all lines of drawer firstly, then start to using drill, saw to cut in edges. Using the sanders to make the edge smooth. And drill the hole for the nails. Put the glue firstly on the edge and place the timber sheet; then nail it!! Then start to make the bowl: Start to create a bowl shape by hammers with timber bowl shape holder and sand bag. When the shape has started to become a bowl shape, but something happened 😓... There is a crack on my bowl, probably caused by too much hits on the part; therefore, it has to be started again. Inside of the bowl  Outside of the bowl Not that bad for the second one. Create the dome shape firstly, then make the surface smoothly; then continue with English Wheel, which making the entire bowl good. Using sander plate to flat the rim and edges. Now, lo

Week 2: Introduction of Digital Making & Metal Shaping

Image
Tutor has shown us the introduction of digital making and metal shaping. Russell showed some of the machines and tools in the workshop. - Bandsaw, drill, disc sander, etc. Also some locations, storage, workshop, and toilet etc. Laser cutting introduction by another tutor, which using Illustrator to create the route of laser cutting.